> ## Documentation Index
> Fetch the complete documentation index at: https://docs.rosetta.sh/llms.txt
> Use this file to discover all available pages before exploring further.
# Using Rosetta
## Connecting Your Wallet
To start using Rosetta:
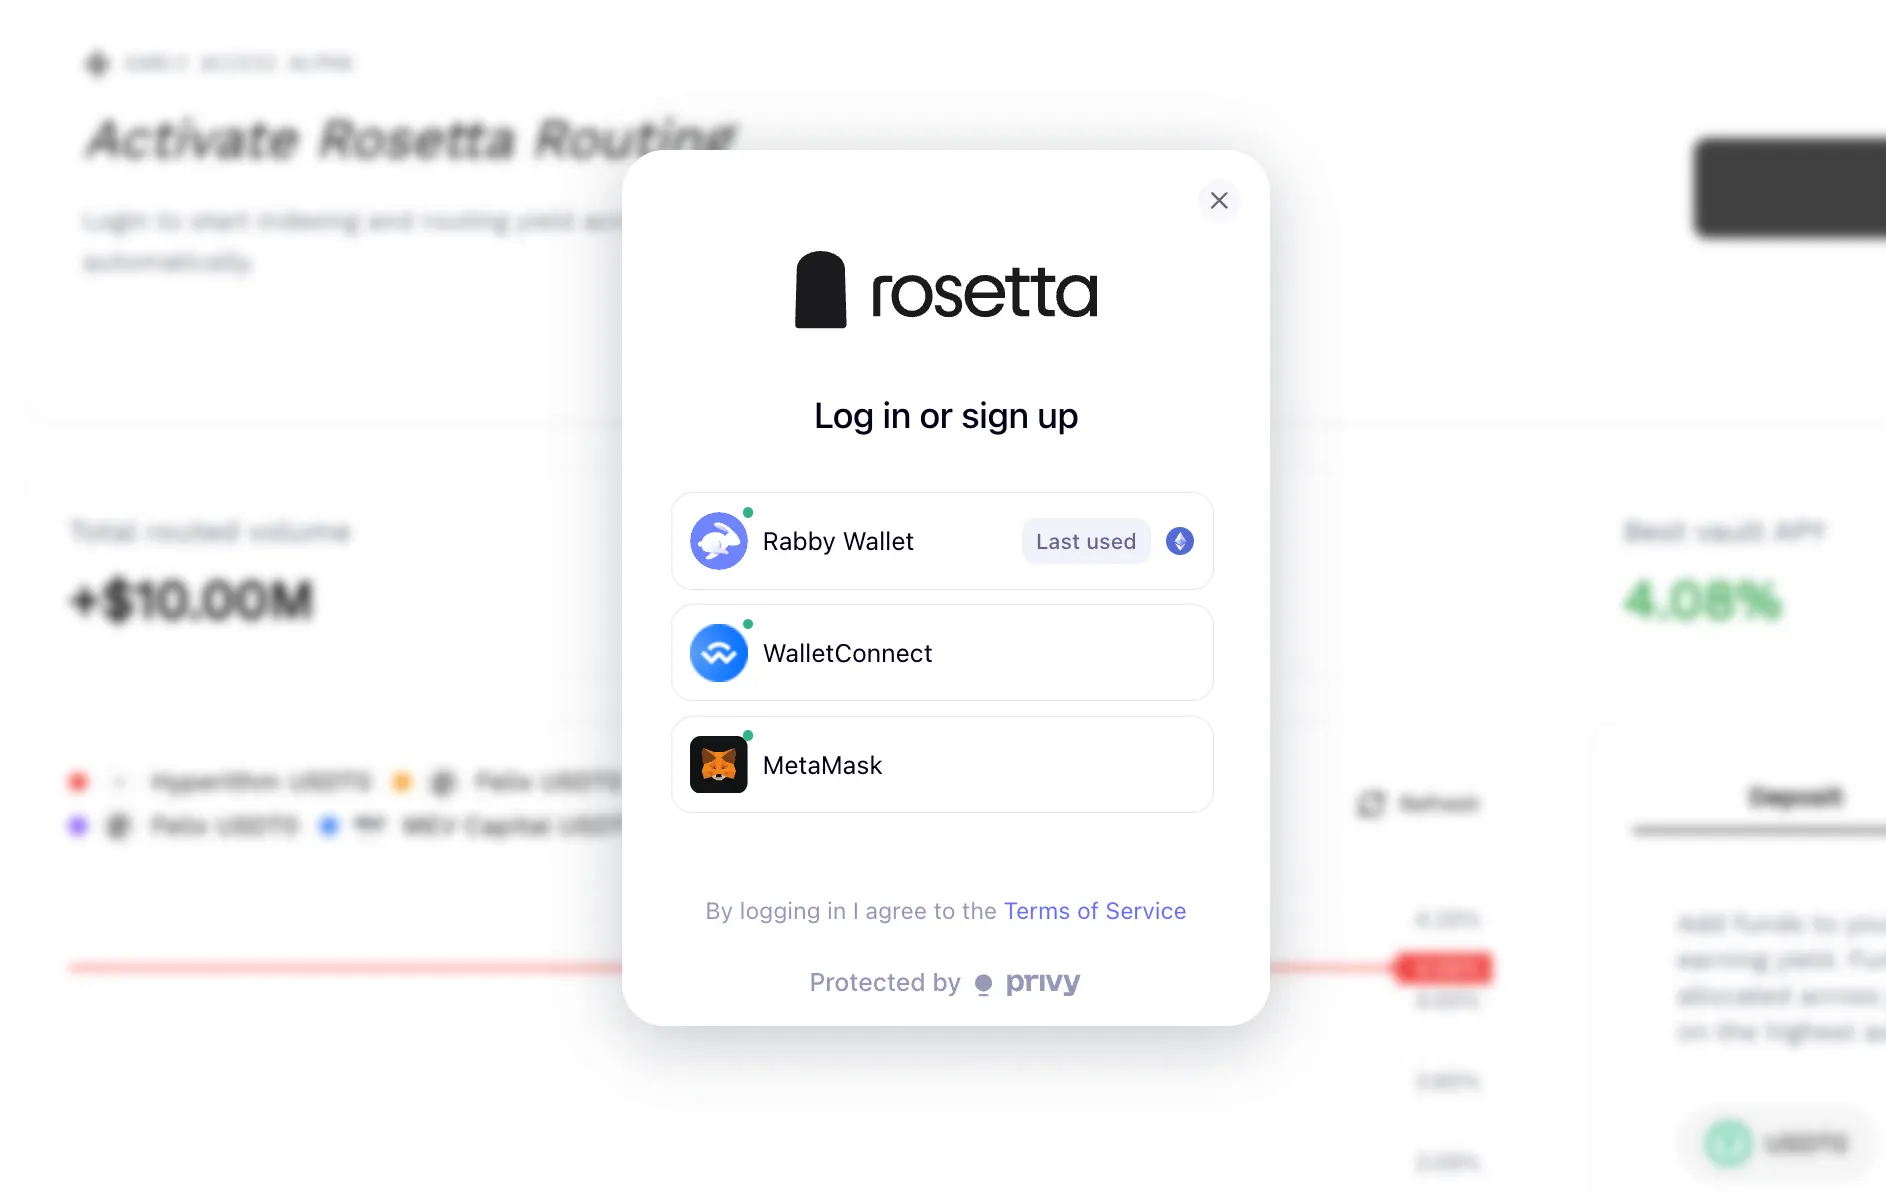
1. Navigate to [app.rosetta.sh](https://app.rosetta.sh/)
2. Click "Connect Wallet"
3. Select your wallet provider (MetaMask, Coinbase, Rainbow, or WalletConnect)
4. Approve the connection
Rosetta uses Privy for wallet authentication, supporting multiple wallet providers.
After first connection, Rosetta will deploy a smart account (sub-account) linked to your wallet. This is a one-time setup per chain.
 ***
## Selecting a Chain
Use the chain selector in the top navigation to switch between supported chains:
* **HyperEVM**: Morpho and Aave markets and vaults, supports USDT0 and USDC
* **Base**: Morpho vaults, supports USDC
Your selection persists across sessions. Each chain has its own sub-account, policies, and balances.
***
## Understanding Your Accounts
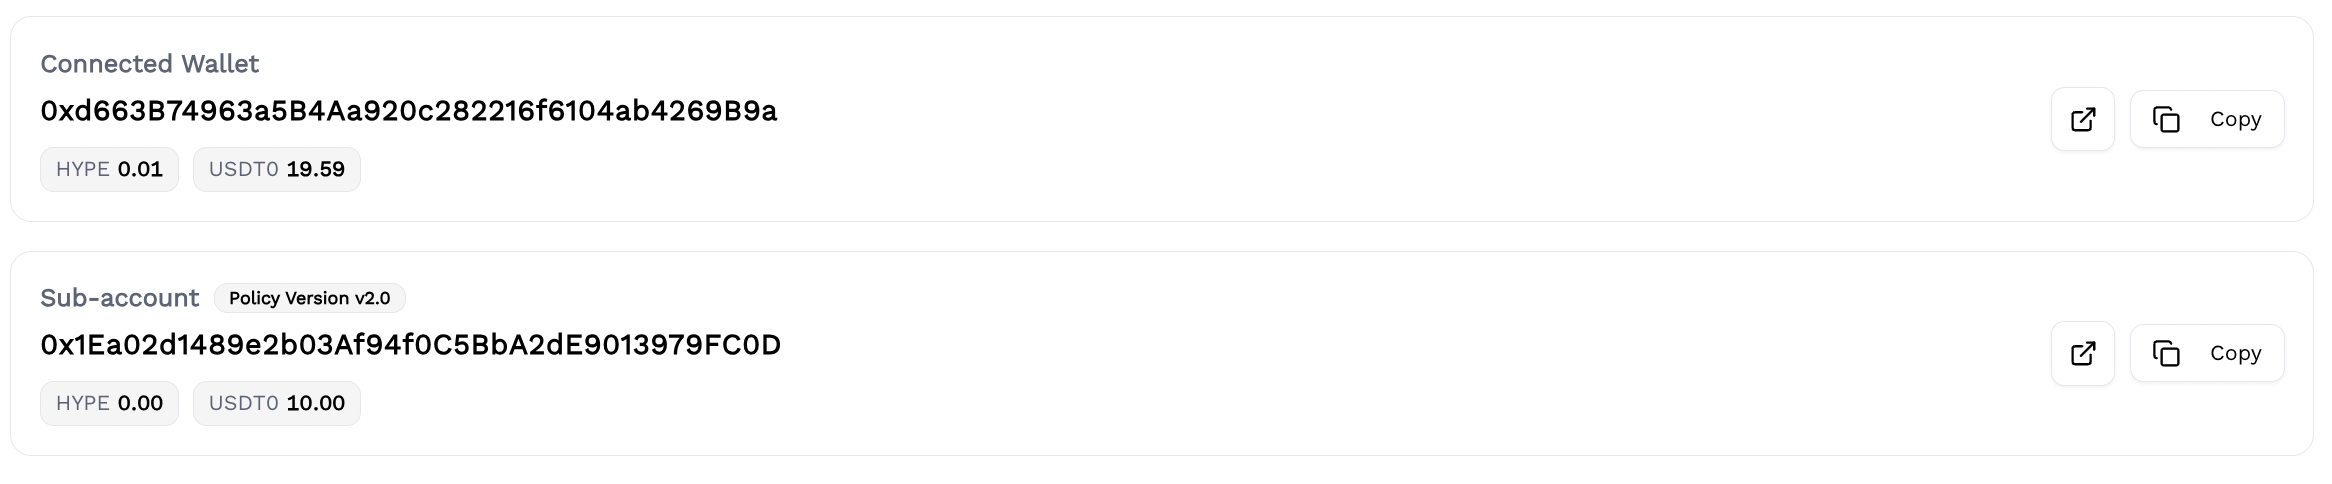
After connecting, you have two accounts per chain:
| Account | Purpose |
| ---------------- | ---------------------------------------------------------------------- |
| Connected Wallet | Your main wallet (EOA). Holds your keys. Receives withdrawals. |
| Sub-account | Smart account that holds routed funds. Controlled by your main wallet. |
Both addresses are visible in the Account section. Funds deposited into Rosetta are held in your sub-account, not by Rosetta.
***
## Selecting a Chain
Use the chain selector in the top navigation to switch between supported chains:
* **HyperEVM**: Morpho and Aave markets and vaults, supports USDT0 and USDC
* **Base**: Morpho vaults, supports USDC
Your selection persists across sessions. Each chain has its own sub-account, policies, and balances.
***
## Understanding Your Accounts
After connecting, you have two accounts per chain:
| Account | Purpose |
| ---------------- | ---------------------------------------------------------------------- |
| Connected Wallet | Your main wallet (EOA). Holds your keys. Receives withdrawals. |
| Sub-account | Smart account that holds routed funds. Controlled by your main wallet. |
Both addresses are visible in the Account section. Funds deposited into Rosetta are held in your sub-account, not by Rosetta.
 ***
## Setting Your Policies
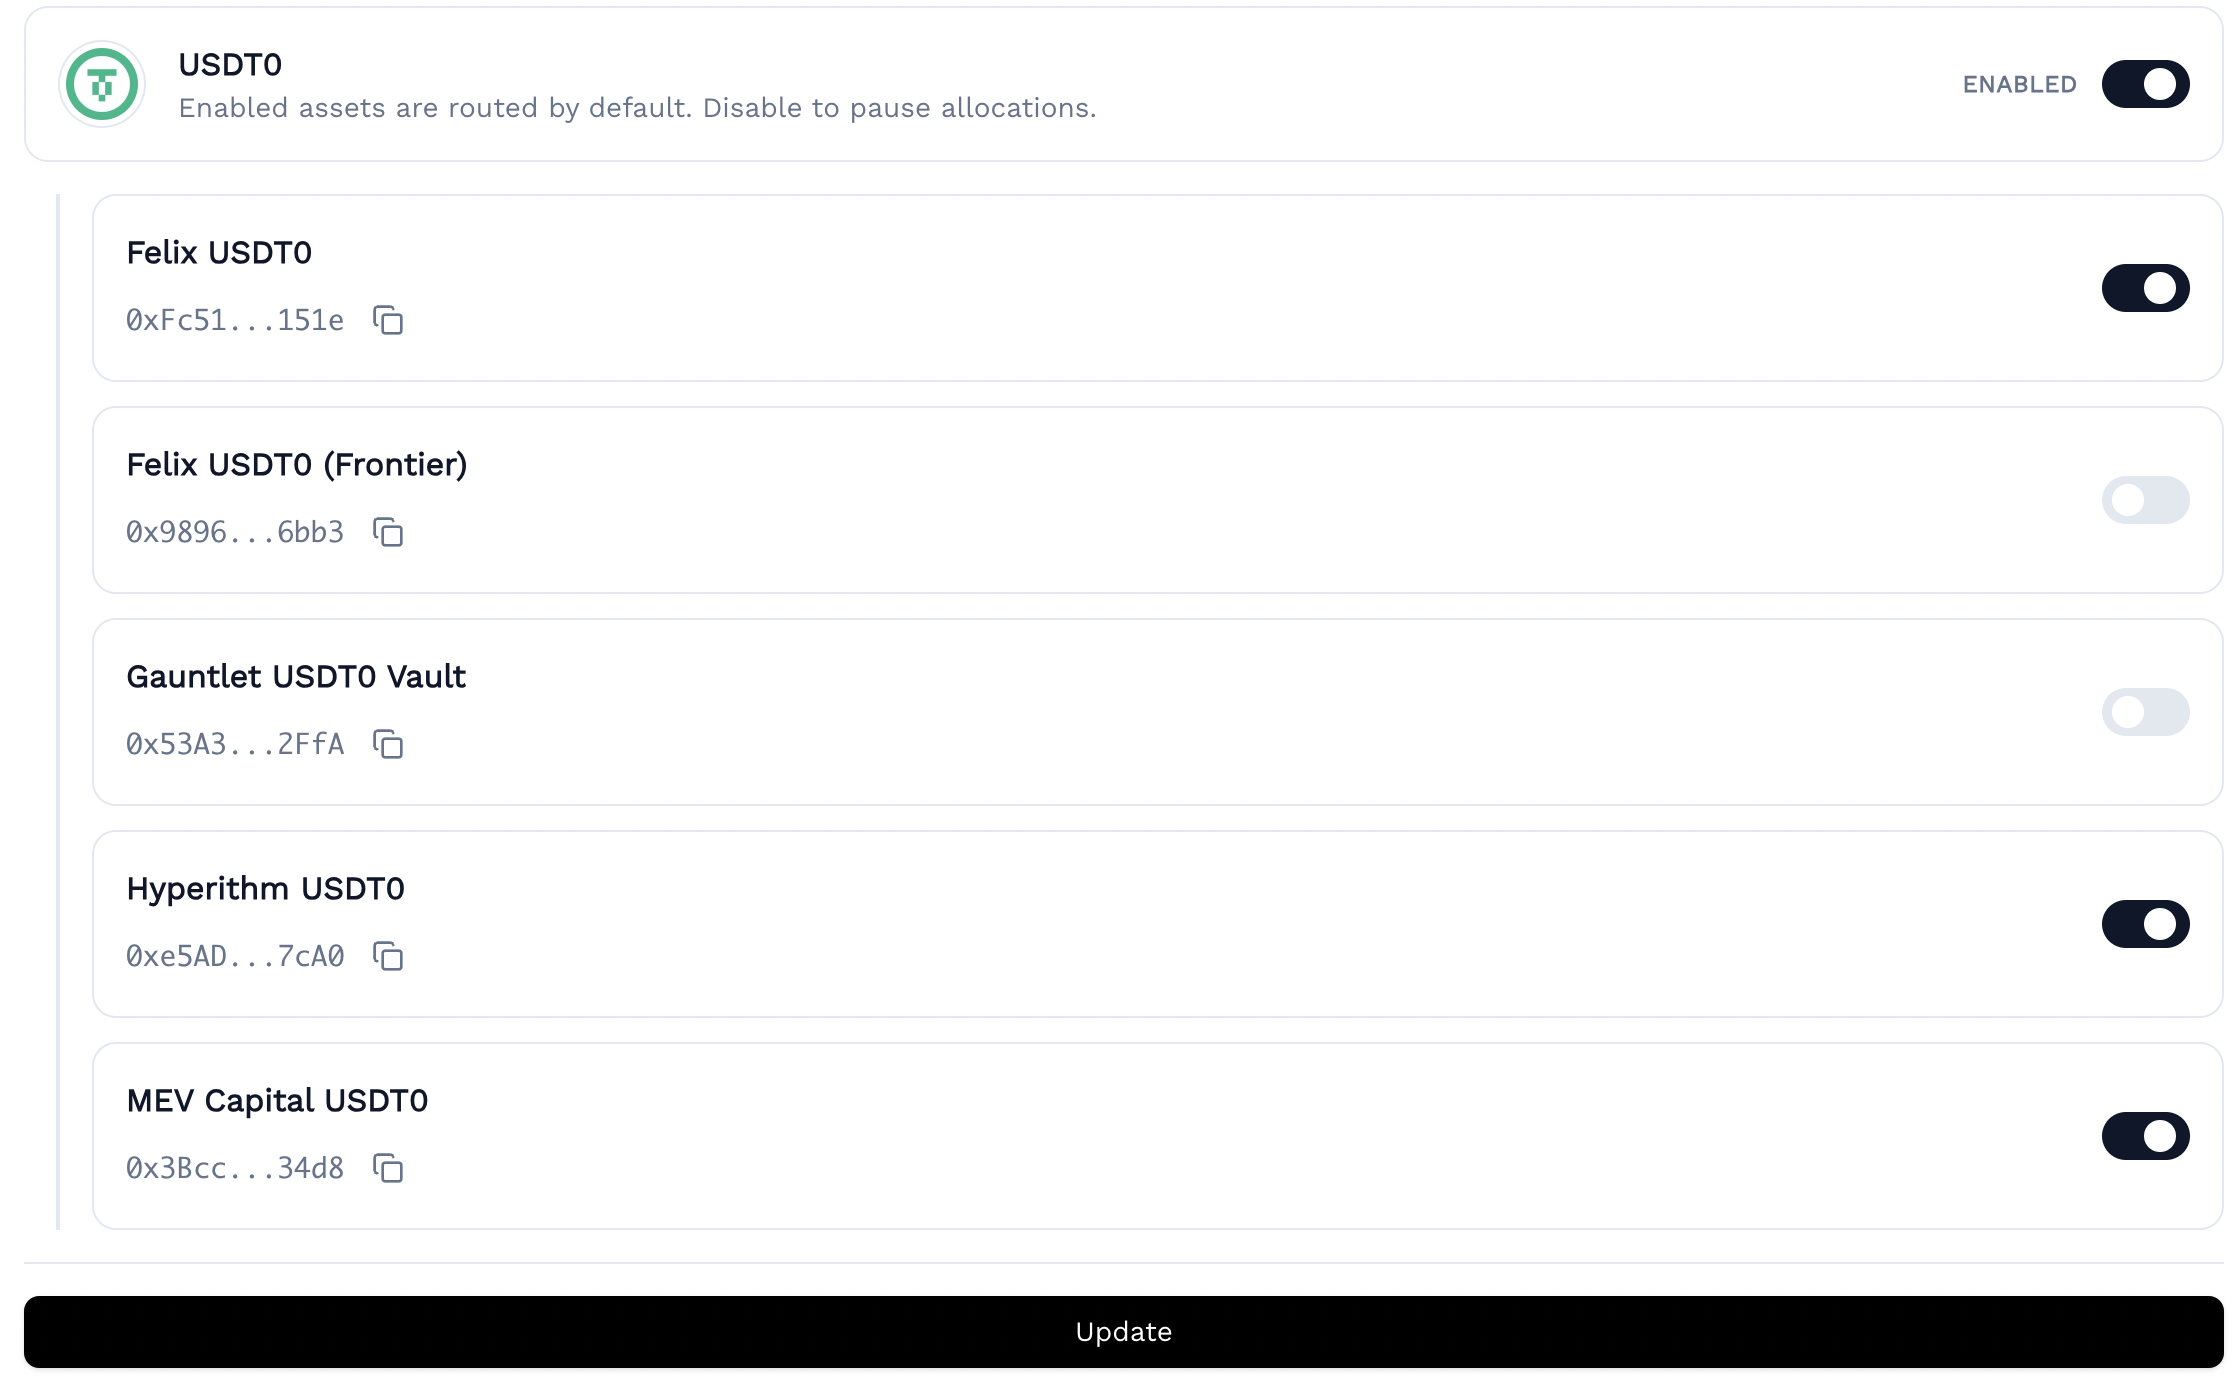
Before depositing, configure which vaults and protocols the Router can access:
1. Select an asset (USDT0 or USDC on HyperEVM; USDC on Base)
2. Enable or disable individual Morpho vaults
3. Enable or disable Aave markets
4. Click Update and sign the transaction
The Router will only allocate to enabled vaults and markets. You can change policies at any time.
***
## Setting Your Policies
Before depositing, configure which vaults and protocols the Router can access:
1. Select an asset (USDT0 or USDC on HyperEVM; USDC on Base)
2. Enable or disable individual Morpho vaults
3. Enable or disable Aave markets
4. Click Update and sign the transaction
The Router will only allocate to enabled vaults and markets. You can change policies at any time.
 ***
## Depositing
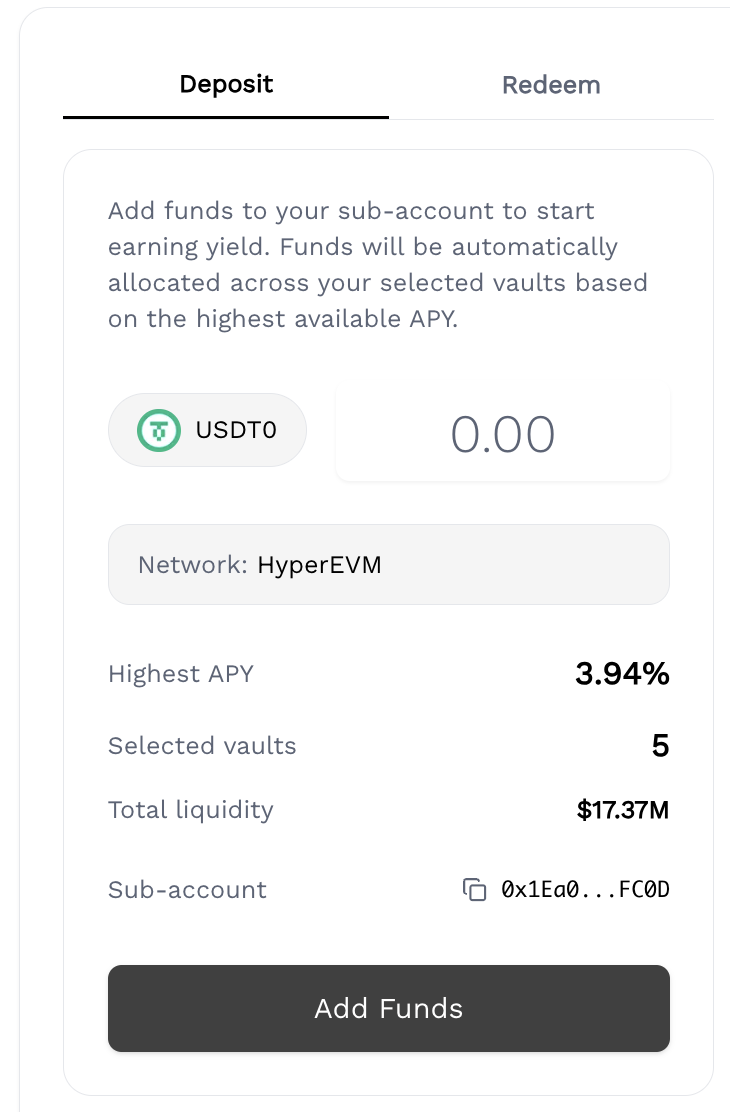
To deposit:
1. Go to Overview
2. Select your asset (USDT0 or USDC)
3. Enter amount (minimum 10 USD equivalent)
4. Click "Add Funds"
5. Approve the transaction
Funds transfer from your main wallet to your sub-account. The Router immediately allocates to the highest-yielding enabled vault or market.
***
## Depositing
To deposit:
1. Go to Overview
2. Select your asset (USDT0 or USDC)
3. Enter amount (minimum 10 USD equivalent)
4. Click "Add Funds"
5. Approve the transaction
Funds transfer from your main wallet to your sub-account. The Router immediately allocates to the highest-yielding enabled vault or market.
 ***
## Monitoring Your Position
### Overview
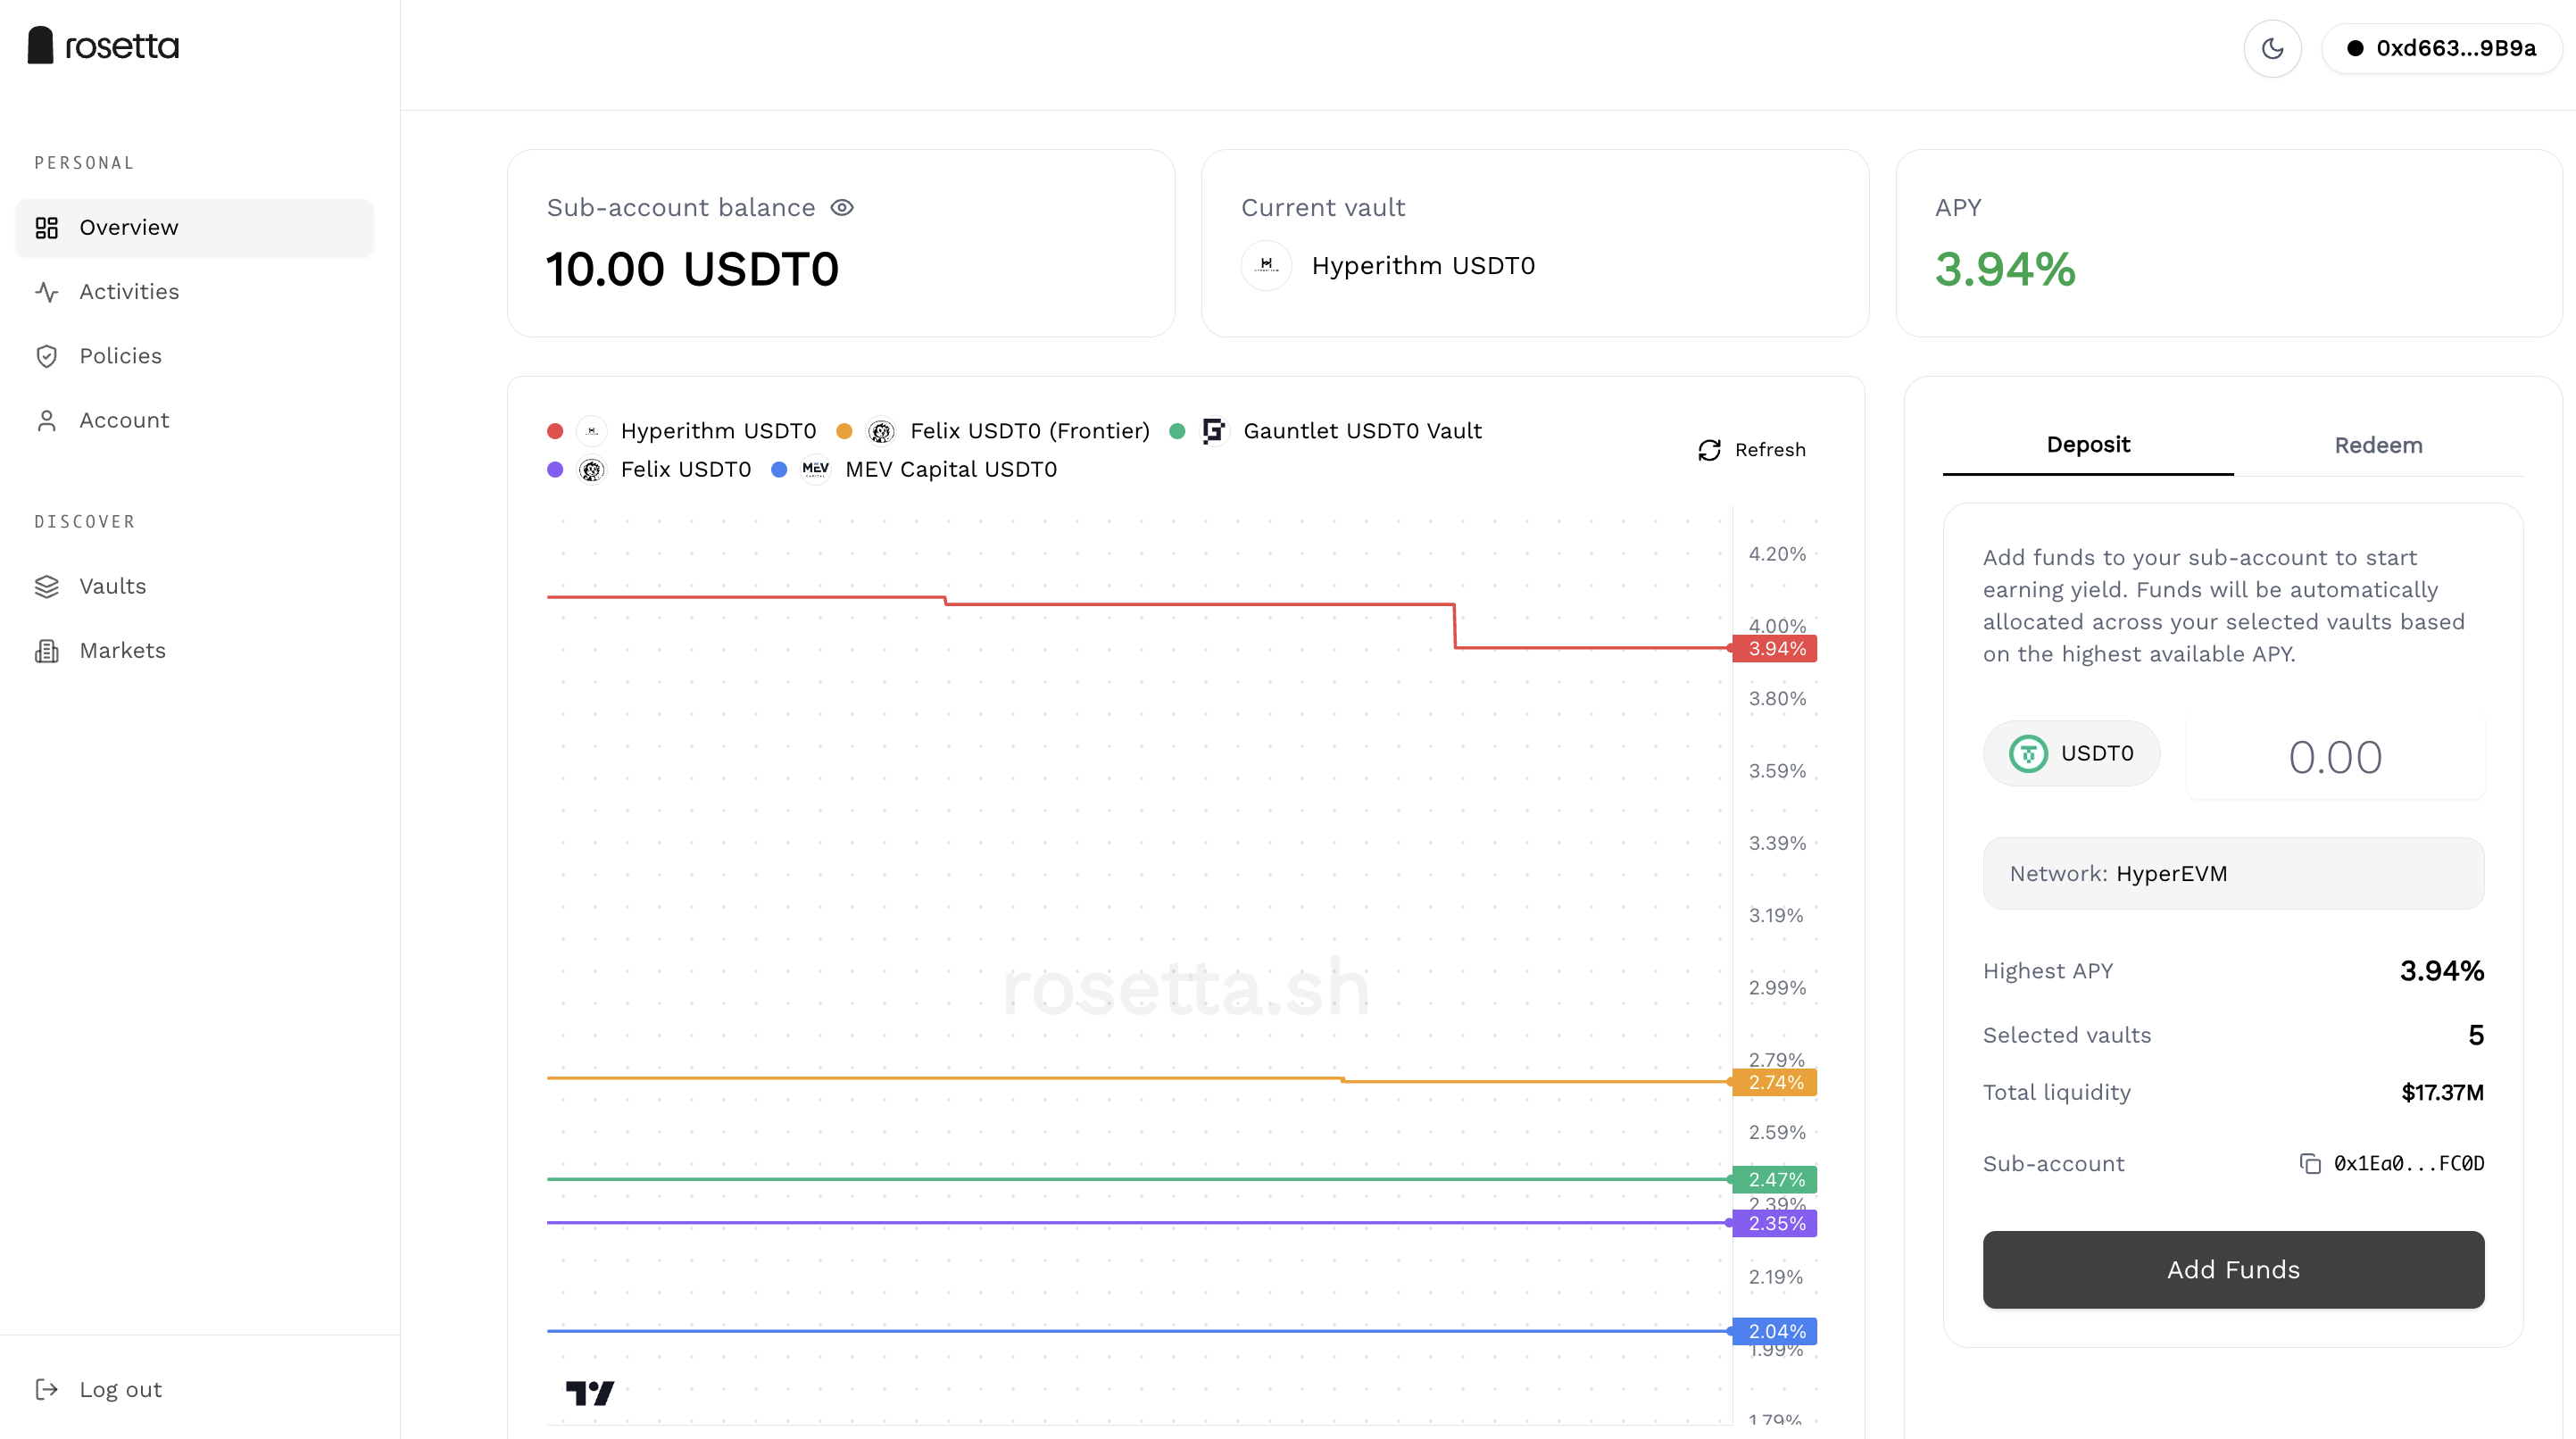
Displays your current balance across all protocols, active vault or market, APY, and a real-time yield chart comparing your enabled vaults.
***
## Monitoring Your Position
### Overview
Displays your current balance across all protocols, active vault or market, APY, and a real-time yield chart comparing your enabled vaults.
 ### Activities
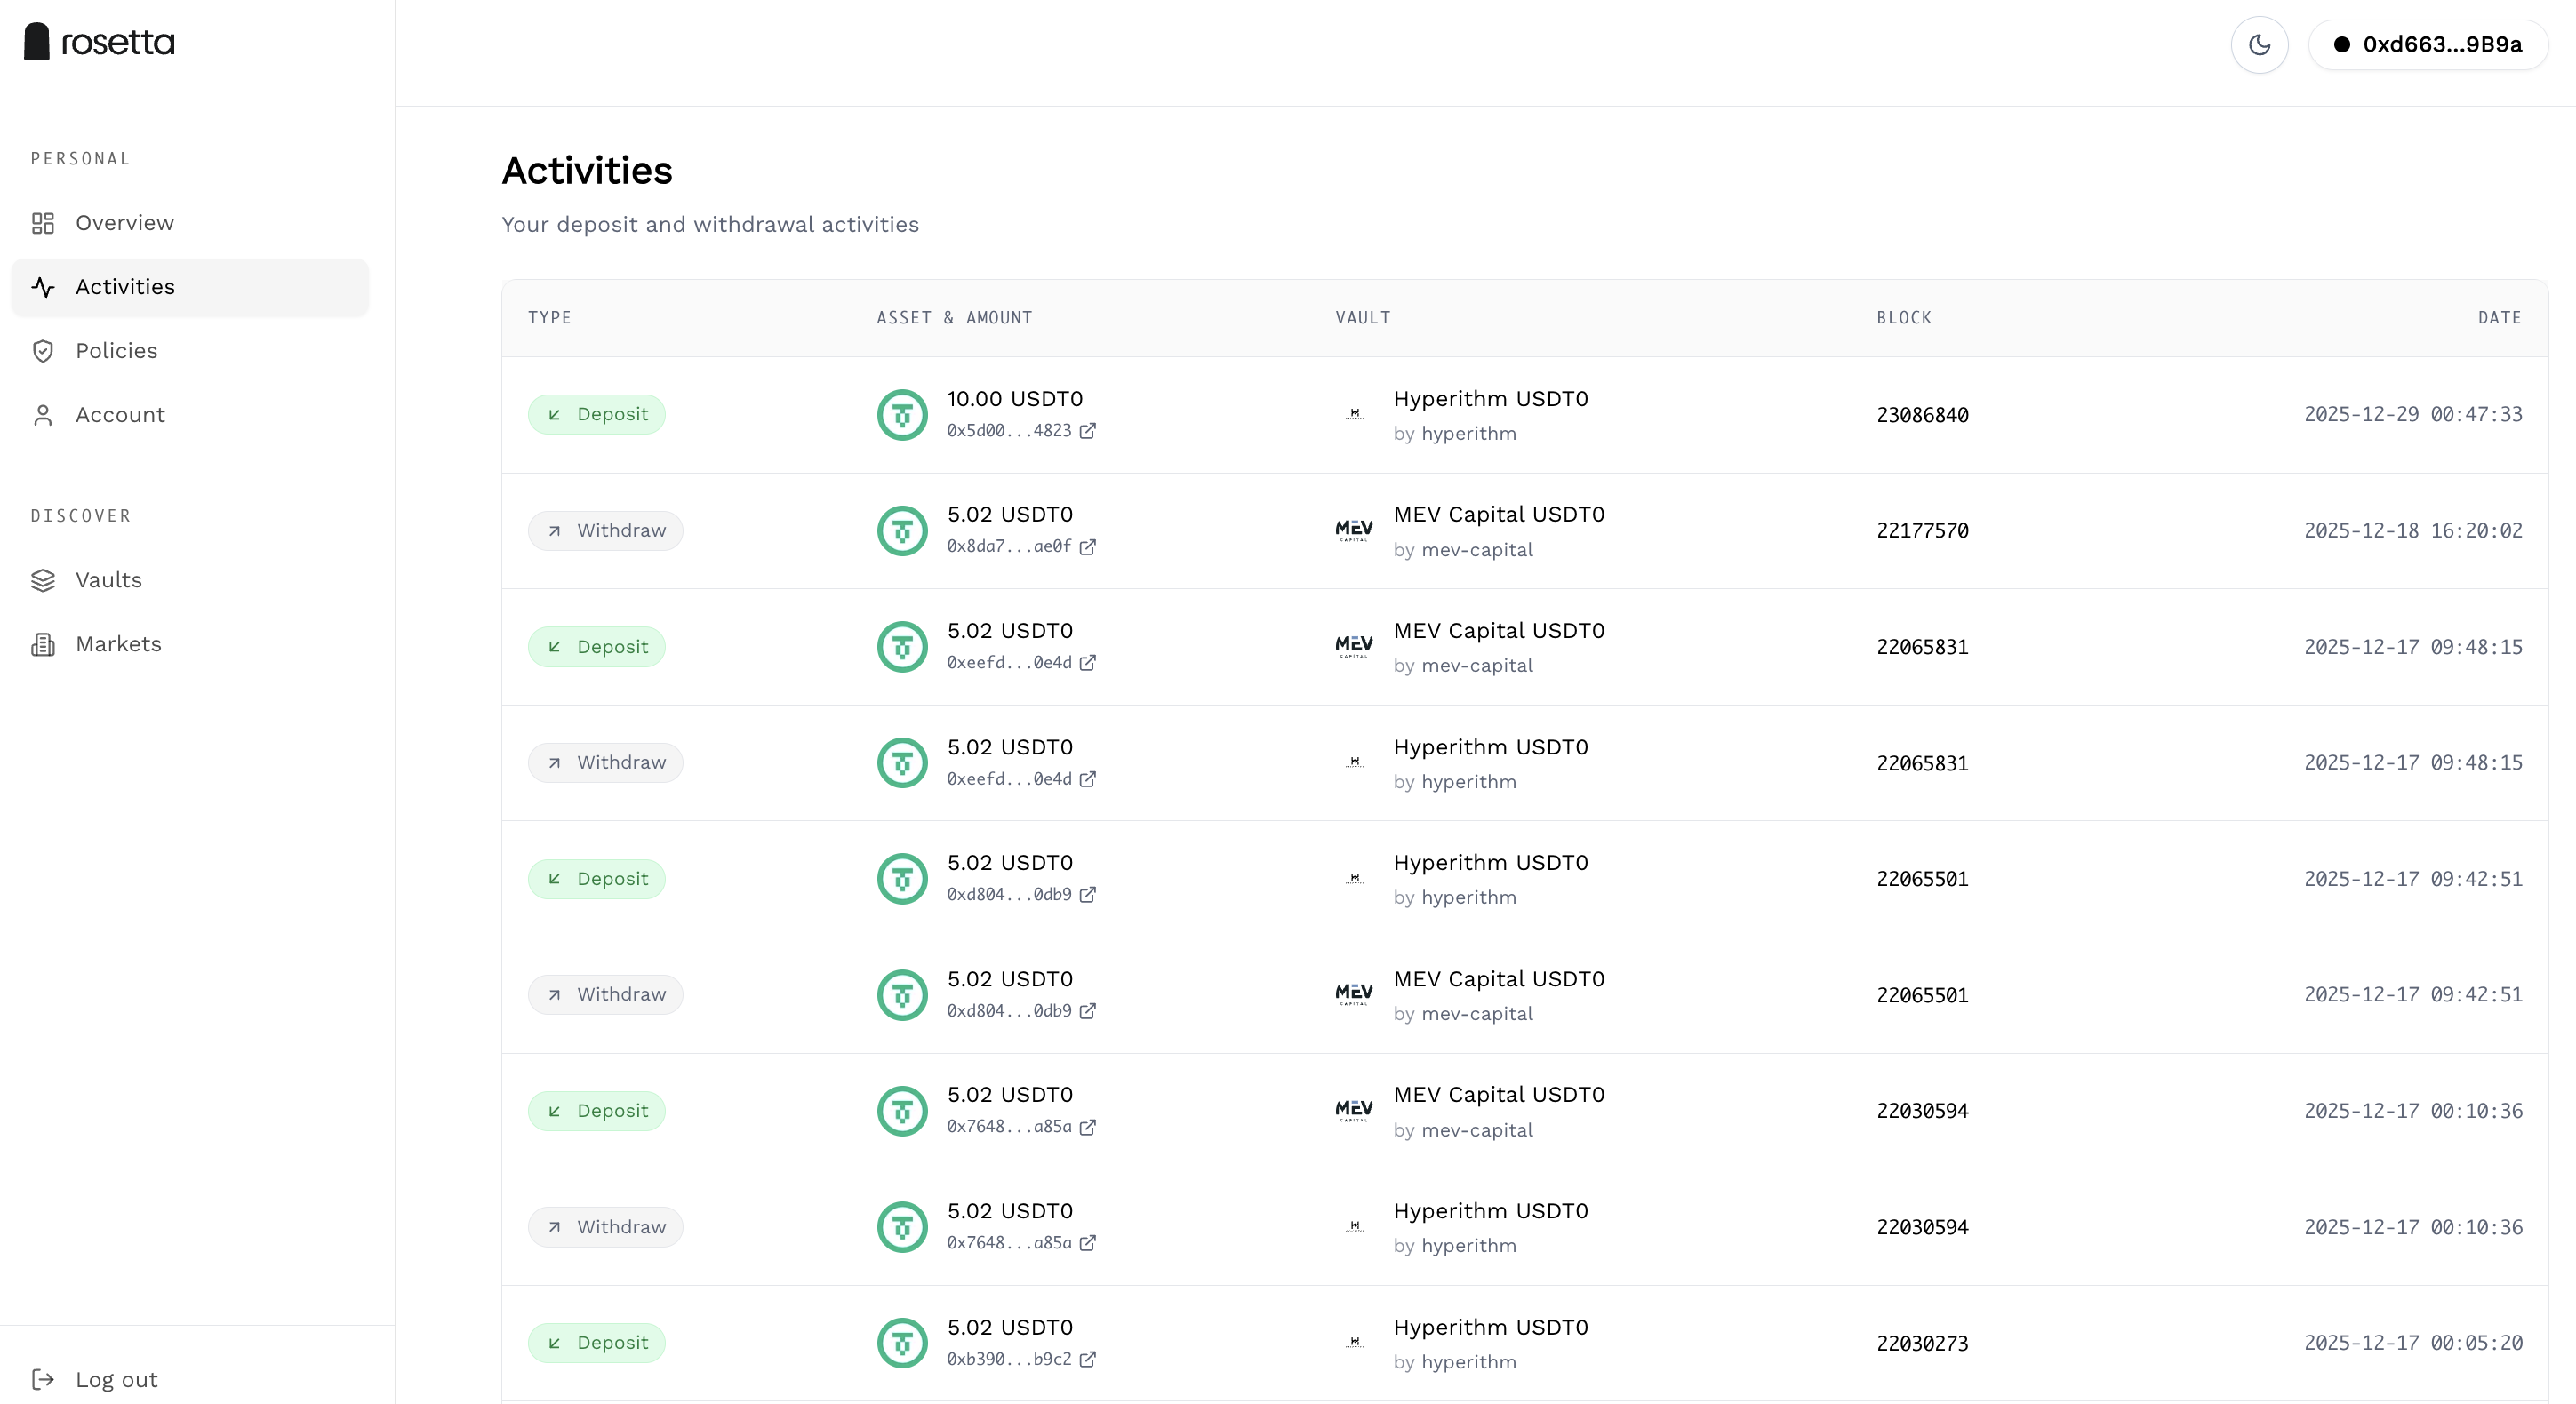
Lists all deposit, withdrawal, and rebalancing transactions with timestamps, block numbers, and protocol labels.
### Activities
Lists all deposit, withdrawal, and rebalancing transactions with timestamps, block numbers, and protocol labels.
 ### Discover
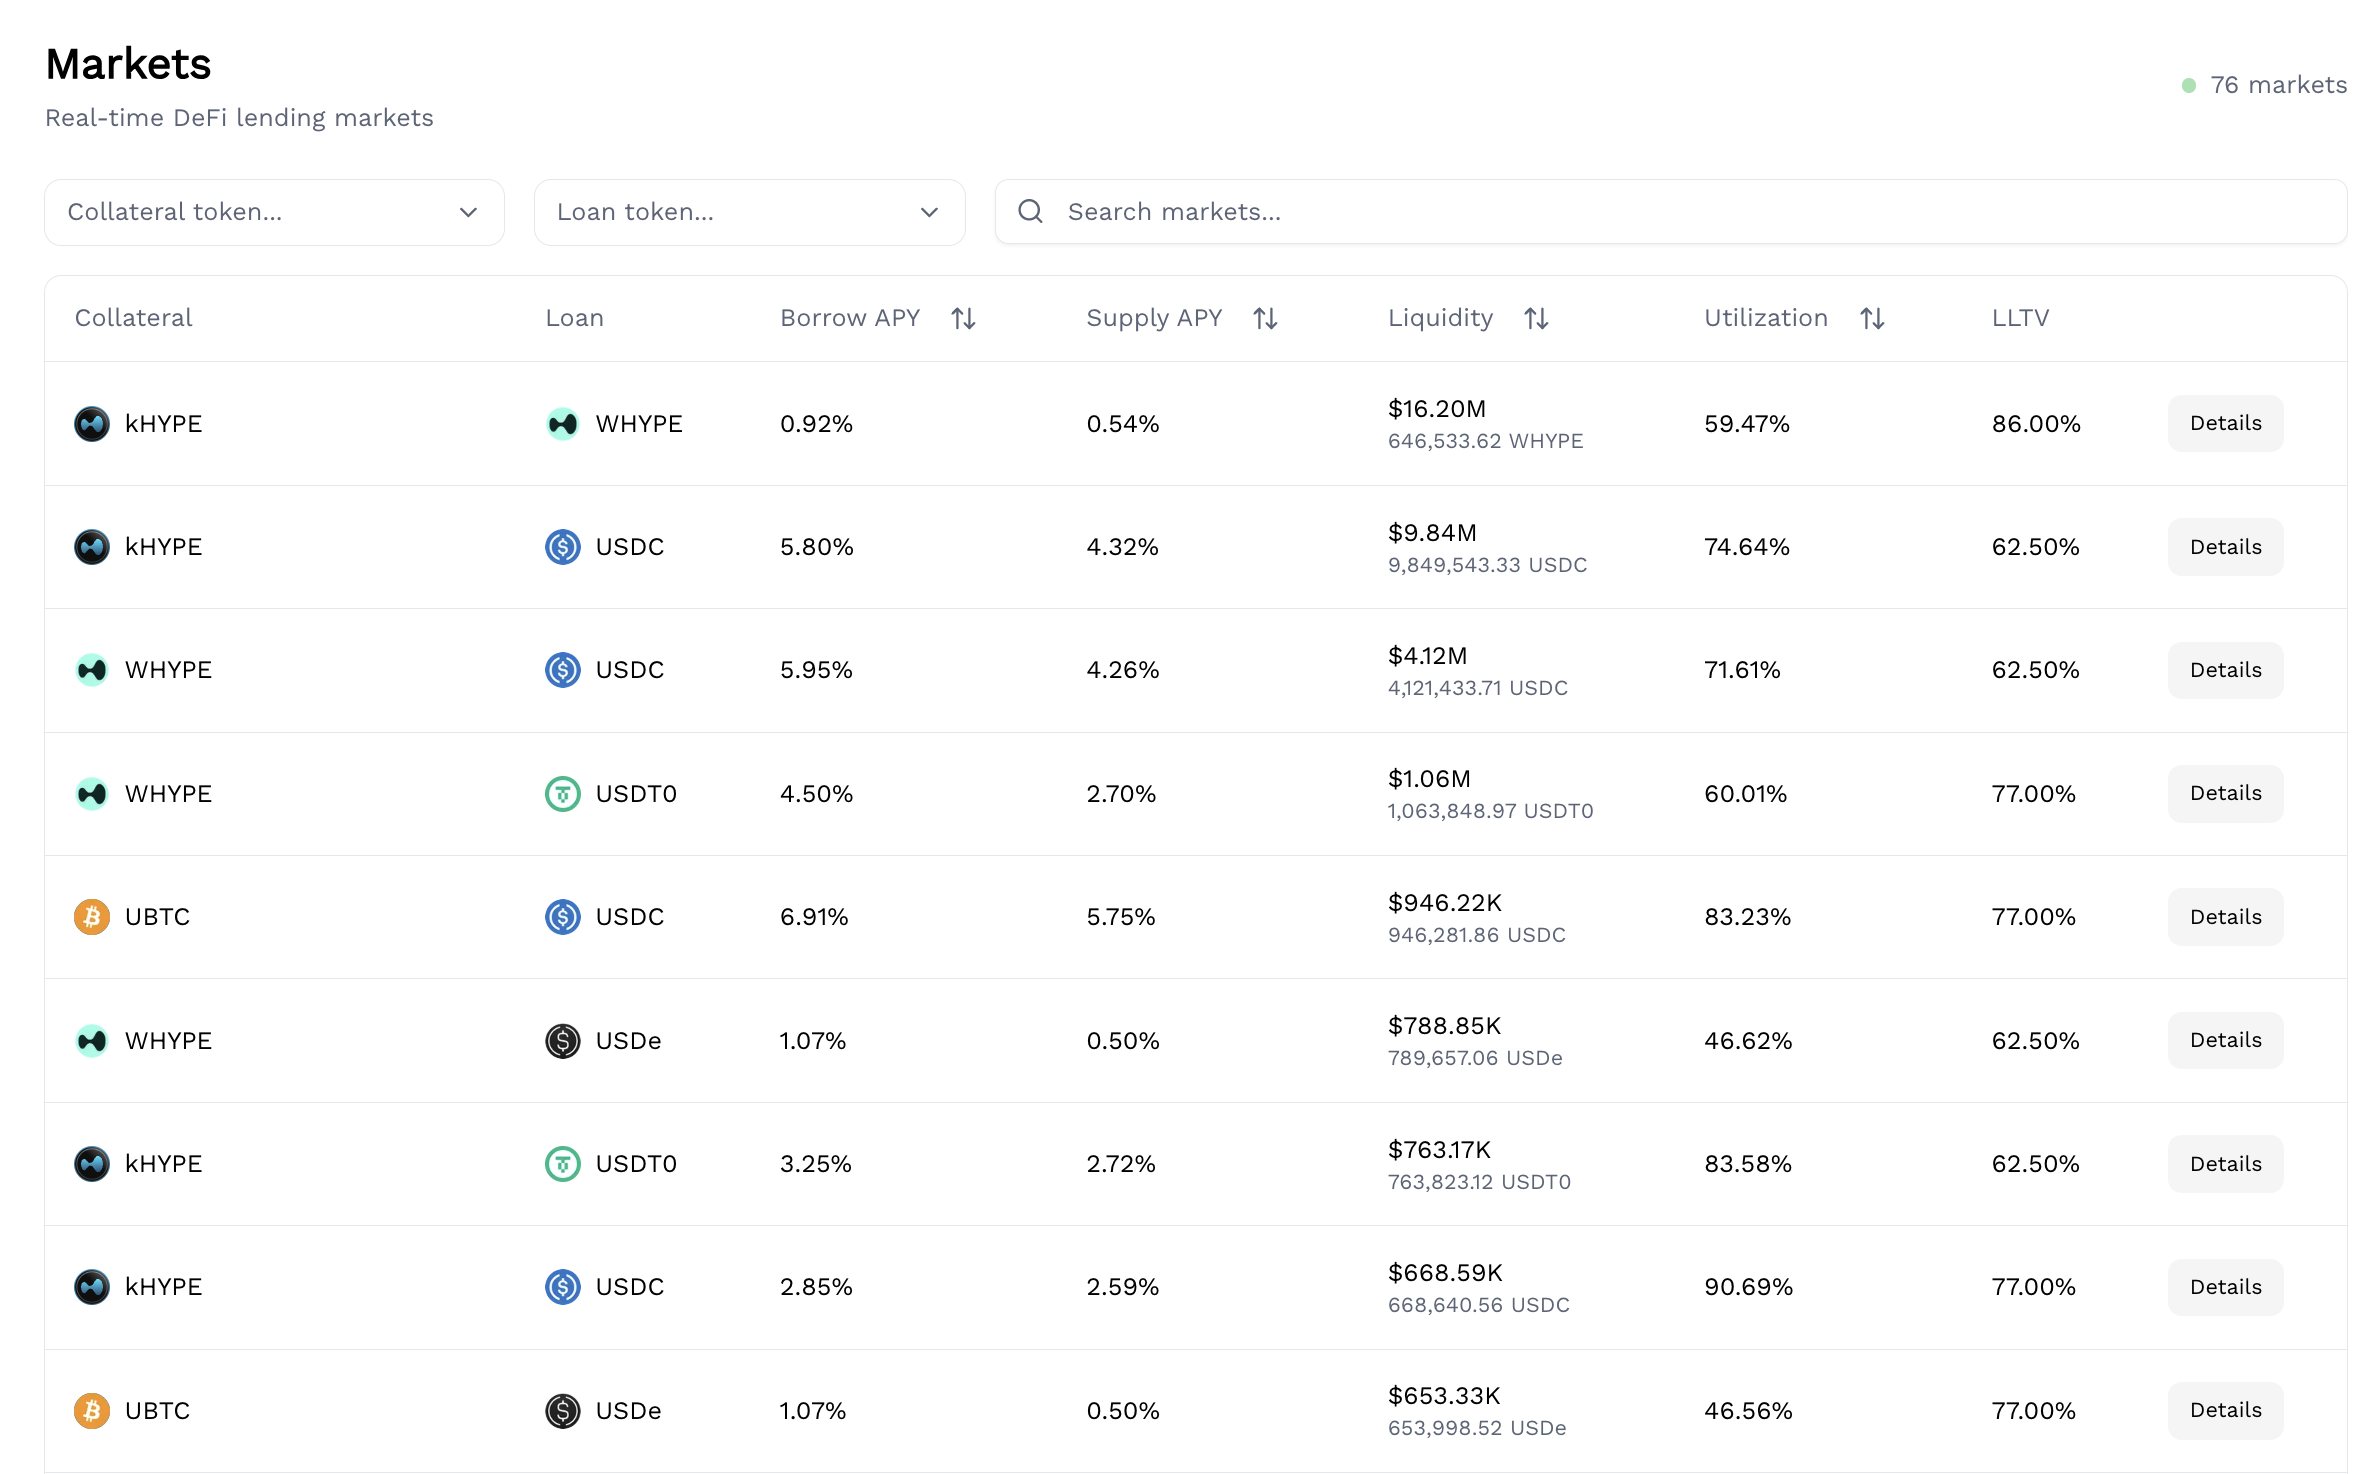
Browse all available vaults and markets tracked by the Indexer:
* **Vaults**: Supply APY, total deposits, market allocation, curator
* **Markets**: Borrow APY, Supply APY, utilization, liquidity, LLTV
* **Aave**: Supply APY, utilization
### Discover
Browse all available vaults and markets tracked by the Indexer:
* **Vaults**: Supply APY, total deposits, market allocation, curator
* **Markets**: Borrow APY, Supply APY, utilization, liquidity, LLTV
* **Aave**: Supply APY, utilization
 ***
## Withdrawing
To withdraw:
1. Go to Overview
2. Click "Redeem"
3. Approve the transaction
Funds return to your main wallet on the same chain. Withdrawals can only go to your connected wallet address.
***
## Withdrawing
To withdraw:
1. Go to Overview
2. Click "Redeem"
3. Approve the transaction
Funds return to your main wallet on the same chain. Withdrawals can only go to your connected wallet address.